Zebra-Striped Shortbread Cookies
This post may contain affiliate links. Please read my disclosure policy for details.
These Zebra-Striped Shortbread Cookies are easier than you thought, made by stacking vanilla and chocolate cookie dough and then compressing them into a log. They are surely the perfect cookies to impress your loved ones.

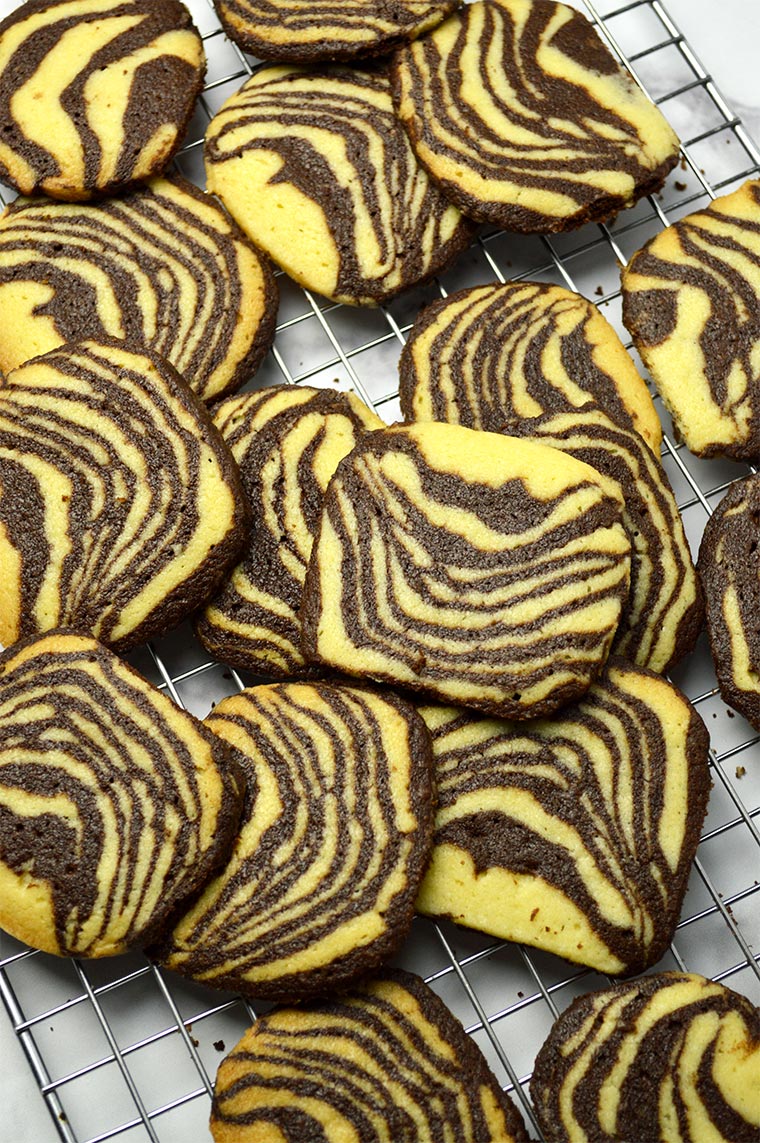
Everybody is familiar with chocolate and vanilla flavors. Why bother to choose one when you can choose both? You are looking at chocolate and vanilla shortbread cookies baked together in a striking striped pattern. Pretty, right?
It looks complicated, but trust me it is much easier than you think. These are eggless cookies, made with 6 basic ingredients you can easily find in your pantry
How to Make Zebra-Striped Shortbread Cookies
You start by making the basic vanilla and chocolate shortbread cookie dough. After you have made both flavors, it is time to layer them.
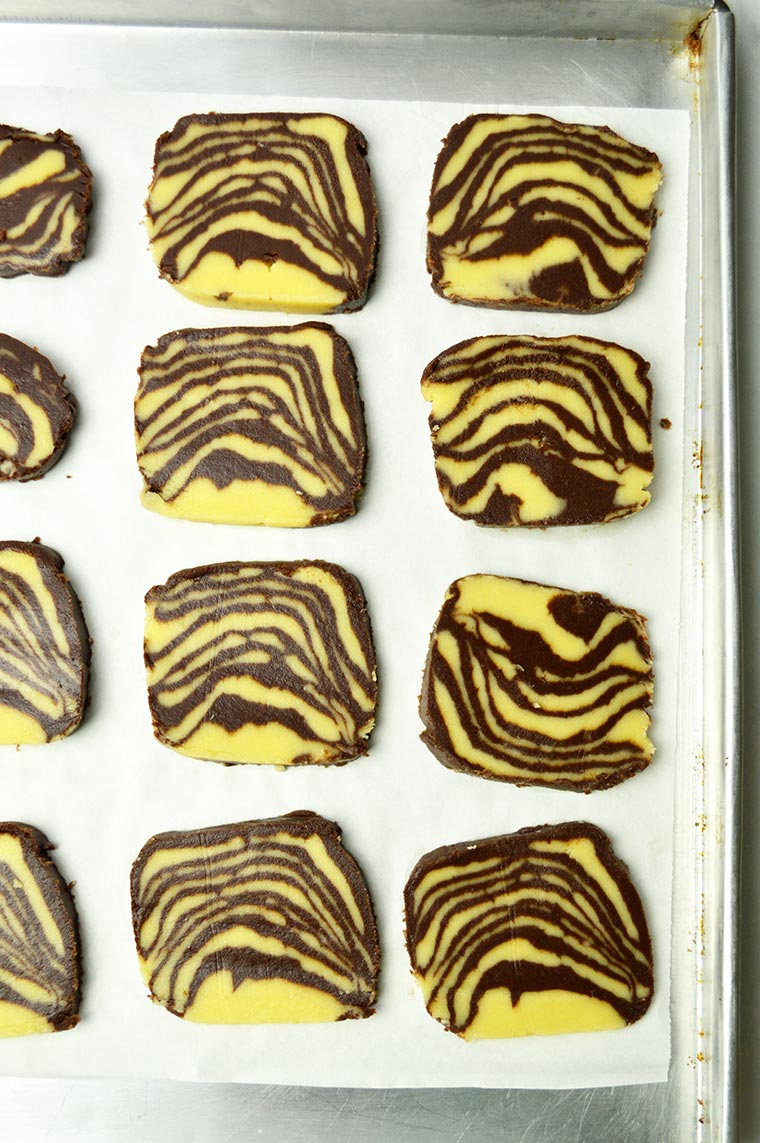
To do this, I divide each dough into two and stack them into 4 alternating layers. Press them gently but not evenly or your zebra pattern will be too neat. Then, cut vertically in the middle. Put one part overlay the other. Not you have 8 alternating layers.

Press, cut, and stack the dough again until you get 16 alternating layers. Press and roll the dough into a log. Cover with parchment paper or plastic wrap and chill until the dough is firm for at least 2 hours.
When ready to bake, cut the log into thin slices about 1/8 to 1/4-inch or about 3-5 mm. Put them into a prepared baking pan and make sure to leave about 2-inch in between because these cookies spread a lot. Bake for 13-15 minutes until the edges turn light brown. Transfer them to a cooling rack immediately.

I also provide a tutorial video on how I made these cookies. You can find it below the recipe card and my YouTube channel.
Make These Cookies in Advance
These Zebra-Striped Shortbread Cookies can be made several days in advance. After you make the cookie log, you can refrigerate it, covered, for up to 3 days prior to baking.
If you are making the shortbread dough longer than 3 days ahead of time, it is best to freeze it. You can simply place the cookie log in an airtight container and freeze up to three months. Thaw it the night before in the fridge, then slice and bake the dough as directed.

More Shortbread Cookies
Check out also the other shortbread cookie flavors!
- Maple Pecan Shortbread Cookies
- Earl Grey Shortbread Cookies
- Matcha Shortbread Cookies
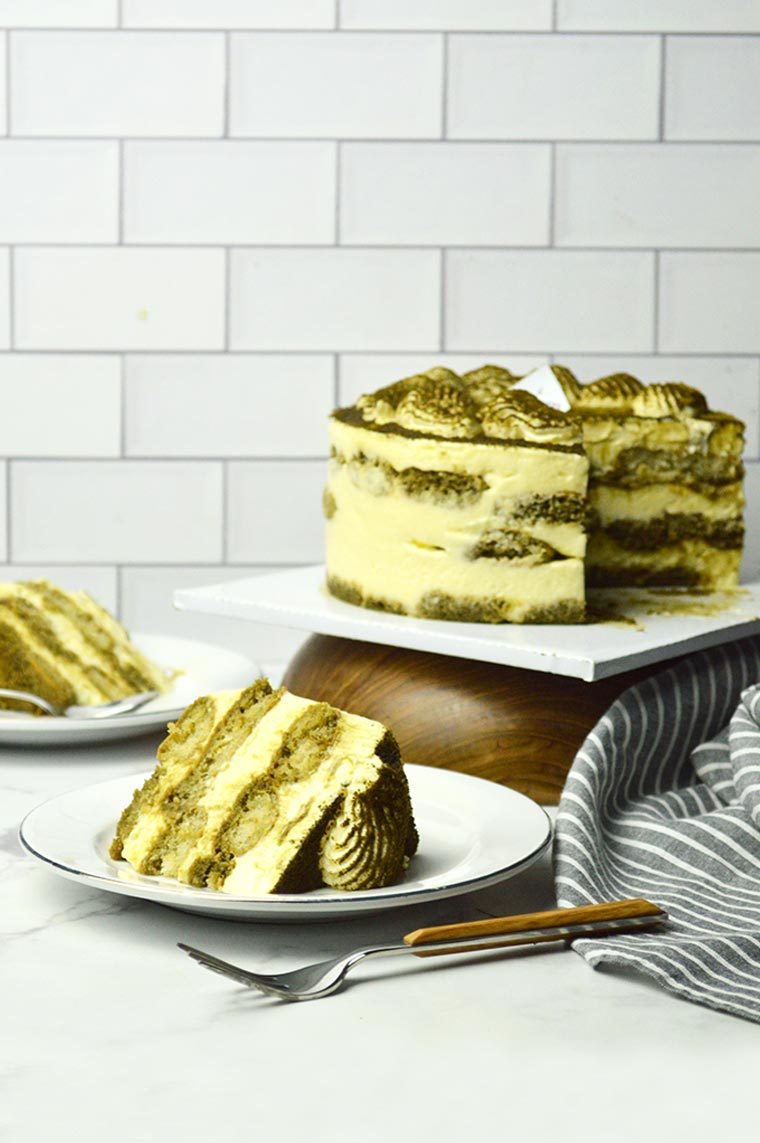
- Zebra-Striped Matcha Shortbread Cookies
- Masala Chai Shortbread Cookies
Ingredients
- 1 cup (225 gr) unsalted butter, softened
- 1 cup (120 gr) confectioners’ sugar
- 1/2 tsp vanilla extract
- 1/2 tsp salt
- 1 3/4 cups (220 gr) cake flour/all-purpose flour, divided
- 1/4 cup (25 gr) cocoa powder
Instructions
Make The Cookie Dough
- Using a hand mixer or stand mixer fitted with a paddle attachment, cream together butter, sugar, vanilla extract, and salt until well incorporated.
- Divide the dough into two balls evenly. Add 1 cup flour to a bowl and mix until well combined with a spatula to make the vanilla shortbread cookie dough.
- Add 3/4 cup flour and cocoa powder to another bowl and mix until well incorporated with a spatula to make the chocolate shortbread cookie dough.
- If the dough is too sticky to handle, refrigerate it for 20 minutes until just a little bit firmer.
Assemble
- Take half of the vanilla cookie dough and flatten it with your hand into a rough 6×3-inch/15×7.5 cm rectangle. Put the flattened dough onto a floured work surface. Take half of the chocolate cookie dough and flatten it again into the same size rectangle. Put the flattened chocolate cookie dough on top of the flattened vanilla cookie dough. Repeat the entire process so you have 4 alternating layers. (See the video for the visual guide)
- Cut the layered dough vertically in the middle with a sharp knife. Then, put one part overlay the other. Press and pat the dough into a rough 6×3-inch/15×7.5 cm rectangle. Cut in the middle and stack the dough again. Press the dough into a log about 2-inch/5cm wide. (See the video for the visual guide)
- Wrap the dough with parchment paper or plastic wrap. If the dough is too long, you can divide it into two and wrap them individually. Chill until very firm for at least 2 hours.
Bake
- Preheat oven to 350F/180°C and line two baking pans with parchment paper.
- Slice the log into a 1/8 to 1/4-inch or about 3-5mm thick with a sharp knife. Arrange the slices on the baking pan, spacing 2-inch apart.
- Bake for 13-15 minutes or until the bottom edges of the cookies are golden brown in color. Rotate the baking sheets halfway through for even baking.
- Transfer to a wire sheet to cool completely.